This solution involves running a ftp server on an android phone, and then using a ftp client on the desktop to comunicate with it. The server is installed the phone because this provides more flexibility (than a linux daemon).
install (assuming ubuntu):
sudo apt install build-essential openssl libncursesw5-dev #g++ libssl-dev libncursesw5-dev
wget https://cbftp.eu/cbftp-r1165.tar.gz
tar xf cbftp-r1165.tar.gz -C cbftp
cd cbftp
make # can add -j[numOfCpuCores]
ln -s $PWD/bin/cbftp /usr/local/bin
in app setup:
from cbftp:
summary of useful commands:
Guide to use git with a basic workflow, which will involve:
fork repo -> locally clone -> new local feature branch created -> branch pushed to forked repo -> open a pull request from the forks new branch to the official repo -> if approved the branch is merged in the official repo
git clone https://github.com/username/<reponame>
cd <reponame>
git checkout -b username-feature
make changes to files
git add .
git commit -m "commit message"
push changes to your fork
-u will set the upstream repo, allowing just git push
in future
git push -u origin username-feature
next, go to the original repo, and make a pull request
merge your feature branch into master branch or the dev branch (if it exists)
Someone else may of made a pull request and had their changes merged, so now your repo doesnt have the latest updates. Somehow these changes need to be pulled down and joined with your fork before you can pull request
git remote add upstream https://github.com/user/forked-repo
git fetch upstream
git merge upstream/master master
method 2, rebase
replay your local work on top of the fetched branch. make sure you are in the branch you want to rebase if you dont specify it
git rebase upstream/master master
If you use linux, you are likely using the gnome or kde desktop environment, these and popular and generally easy to setup, but when looking for a lightweight option xfce is a possibly better option. But, out of the box xfce looks terrible, espically if your distro packages it with no theme.
install xfce4 from anouther desktop environment or a minimal installation of linux
sudo apt install xfce4
The xfce4 desktop environment contains two panels, one at the bottem and one at the top.
install components for the panel
sudo apt install xfce4-whiskermenu-plugin xfce4-battery-plugin network-manager-gnome
After installing, simily right click the panel, and click add new items, from here you can search and add the whiskermenu, battery indicator and network applet.
In future you can copy your ~/.config/xfce4 folder to anouther machine/parition, and your panel settings will persist.
Run xfwm4-settings. You can select a theme, which will mostly effect the style of the window, the gtk themes discussed bellow have more visual impact.
Here you can setup keyboard shortcuts that allow you to
Xfce4 is built using the gtk toolkit, so a system gtk theme will style all xfce4 components, and since most linux GUI apps are written with gtk (EG firefox, thunderbird, …), they will fit in.
Grab a theme from https://www.xfce-look.org or https://www.gnome-look.org (both use gtk3) and follow install instructions. Generally, you will have to download and extract an archive, then copy it to /usr/share/themes, finally click it from the xfce4-appearance-settings window.
An example theme with many colour options called midnight
Download theme from https://www.xfce-look.org or https://www.gnome-look.org
Install the same way as gtk themes, but copy to extracted theme to /usr/share/icons and select from the icon tab of the appearance menu.
Next time you log in, from your display manager select xfce4-session. This will load your gui with xfce4 rather than gnome or kde.
If you dont use a display manager and manually run startx then run
echo xfce4-session >> ~/.xinitrc
Open gparted, create your ext4 root partition, if you have a separate media partition and dont plan to use steam games, then <30GB should be enougth. See dual booting linux for parition schemes.
lsblk
mkfs.ext4 /dev/[parition_id]
mkdir /mnt/deb
sudo mount /dev/[parition_id] /mnt/deb
This script will bootstrap a minimal debian or ubuntu system. Install
sudo apt install debootstrap
example options
flavor choose a flavour/suite of debian, sid=unstable, bullseye=testing, buster=stable
stable has old packages but is good for servers, otherwise testing gives more up to date packages
sudo debootstrap
--variant=[minbase | buildd] \
[flavor] \
[build_dir] \
[debian_mirror]
sudo debootstrap \
--variant=buildd \
bullseye \
/mnt/deb \
http://ftp.uk.debian.org/debian
get uuid of mounted parition
sudo blkid | grep -w UUID=
copy your original fstab, and replace root uuid with uuid of mounted partition
sudo cp /etc/fstab /mnt/etc/fstab
Here the root is temporary changed to the debootstraped system. Allowing for us to run commands within it. Additional mounts are needed to get some programs within the chroot to work.
mount -t proc proc /mnt/deb/proc
mount -o bind /dev /mnt/deb/dev
mount -o bind /sys /mnt/deb/sys
chroot /mnt/deb
If not using a server, you will need to set your local timezone.
ln -sf /usr/share/zoneinfo/Europe/Berlin /etc/localtime
If not using a server, you should configure and generate locales.
dpkg-reconfigure locales
vi /etc/locale.gen
#uncomment your locale, EG for germany
de_DE.UTF-8 UTF-8
de_DE ISO-8859-1
de_DE@euro ISO-8859-15
locale-gen
vi /etc/locale.conf
LANG=de_DE.UTF-8
dpkg-reconfigure keyboard-configuration
echo -e `hostname` >> /etc/hostname
echo -e \ "127.0.0.1\tlocalhost\n::1\tlocalhost\n127.0.1.1\t`hostname`.localdomain `hostname`" >> /etc/hosts
Rather than manually configure network interfaces, its much easier just to use network-manager.
apt install network-manager
passwd
useradd username
usermod -aG sudo username
Grub is the most widely used bootloader and will likely work with little config.
sudo apt install grub os-prober
ls /sys/firmware/efi
sudo grub-install --target=x86_64-efi --efi-directory=/boot/efi --bootloader-id=debian-grub
sudo apt install efibootmgr
sudo grub-install --target=i386-pc /dev/sdX
sudo grub-mkconfig -o /boot/grub/grub.cfg
apt-cache search linux-image
apt-get install linux-image-amd64
install programs you want staright after reboot
apt-get install curl wget vim tmux
exit
unmount -R /mnt
reboot
Vim is highly customizable and has multiple modes for productivity, with the right plugins you can make it into a multi-language IDE.
There is a lot of plugins so I’ll split it into 2 parts with this part showing essentional setup.
Basic knowledge of vim configuration.
Some distributions come shipped with vim-tiny or just terminal vim, and these packages normally lack functionality. Where as the graphical package contains all vim functionality, its good to have even if you dont use graphical vim. The package has different names between distribtuions but generally its called vim-gtk3 or gvim.
sudo apt install -y vim-gtk3
Basic configuration for ~/.vim/vimrc configuration.
Generally these will be updated by language pack relative to open file type.
set tabstop=4
set softtabstop=4
set shiftwidth=4
set expandtab
These are keys that prefix a macro, so more key combinations can be mapped. And this will be usefull with code-specifc plugins later on.
let mapleader=','
let maplocalleader='\'
define custom commands to use with :command
remove whitespace
command! FixWhitespace :%s/\s\+$//e
enable plugins
filetype plugin indent on
This adds a toggleable pane to the left of the editor that shows the current directory. Vim has a built in PE called netrw, but generally the nerdtree plugin is much popular.
https://github.com/preservim/nerdtree
Used to find things via typing some of what you want to find, and the finder guessing what you mean. Can be used to find files, and they generally hook into any search commands.
Fzf also has a version outside vim thats usefull for finding files straight from the terminal.
Allows you to preview colors in vim, when you type a color its name reflects its background color.
https://github.com/gko/vim-coloresque
Integration with git version control.
Snippets of code, this will autocomplete characters into a predefiend snippet.
EG autocomplete java System.out.println() to sout
Saves all open files as a session, you can save multiple sessions persistently. So you can log off/on and resume on to where you where.
Collection of language packs, extends vims built-in syntax and language specifc options.
Vertical jotted line that shows indentation between horizontal lines.
Install the languages/tools your vim will need to support. If your language is constantly updated, your distribution may not have the latest package, for example ubuntu generally has verions of nodejs and npm that aren’t compatible with each other.
curl -sL https://deb.nodesource.com/setup_14.x | sudo -E bash -
sudo apt-get install -y nodejs
sudo apt install -y python3 pip3
sudo apt install texlive-latex-extra
sudo apt install latexmk
Linters are programs that scan a file for errors and style problems in your code, they then present these errors to you.
Fixers detect style problems and maybe some errors, and then they automatically fix them after a certain condition, for example every time you save the file.
Using multiple linter/fixer plugins and configuring them can be difficult, so its better to use a large all in one solution. Ale is a plugin that lints asyncronously, so it will run scans every time you change vim mode.
Linter and fixer programs generally apply to one language, so we will need at least one per language.
install the linters and fixers
sudo npm install eslint -g
pip3 install pyflakes
pip3 install black
sudo apt install chktex
sudo apt install lacheck
if you cant find a linter or fixer, you can check ales linter scripts, all supported linters with be there https://github.com/dense-analysis/ale/tree/master/ale_linters
then tell ale to use them in vimrc
let g:ale_linters = {
\'javascript': ['eslint'],
\'python': ['pyflakes'],
\'tex': ['chktex', 'lacheck']
\}
let g:ale_fixers = {
\'*': ['remove_trailing_lines'],
\'javascript': ['eslint'],
\'python': ['black']
\}
Microsofts language server protocol uses a server to provide intellisense to the editor (client), since the functionality instant build stright into the editor, it can easyily be implemented across many editors. The main lsp functionality is autocomplete, but most provide many more features: go to definition, refractor, lint, …
Vim needs a plugin to act as a client for the language server. Coc.nvim is one that gets activate development, and has many language servers from vs-code extensions.
Coc.nvim has lsps to support most languages and most LSPs can be installed without any configuration as an extension via
:CocInstall coc-lspname
If you cant find a working/compatible linter/fixer/lsp for a language or need more functionality, then you get an individual plugin for that language.
For example vimtex for latex.
May also need additional packages, vimtex requires latexmk to compile docs.
]]>bootable usb drive with >4 gig
second SSD or HDD: It is recommended to install linux on a different drive from windows (as there may be future problems or a longer installation)
this guide assumes you have a UEFI/GPT system (most likely)
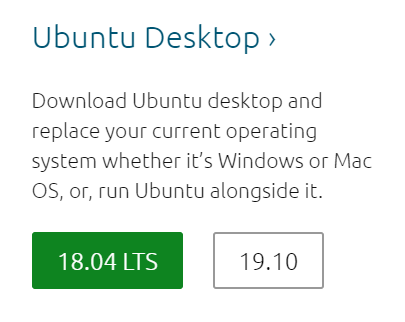
First we need to download a linux os in the form of an iso. In this example I’ll use ubuntu
Navigate to https://ubuntu.com/download and download a version of ubuntu
We can use a hash algorithm to check if the ISO has been tampered with (which may break linux or infect your installation).
method 1, run cmd and type: FCIV -sha256 C:\[path to file]
method 2, run powershell and type: Get-FileHash -Path C:\[path to file] -Algorithm SHA256
method 3 (GUI): If you have 7zip installed, right click the iso and click calculate hashes (only look at the SHA256 hash).
Compare calculated hash to hash displayed on ubuntu’s website for your ubuntu version, if the hash doesnt match you should discard it and get anouther iso.
First you need to install a software that can burn the iso to our usb.
Navigate to https://rufus.ie and click download.
Plugin your USB, then launch rufus.
Select the USB and the iso you downloaded earlier.
Then select gpt partition scheme and uefi mode, finally click Start.
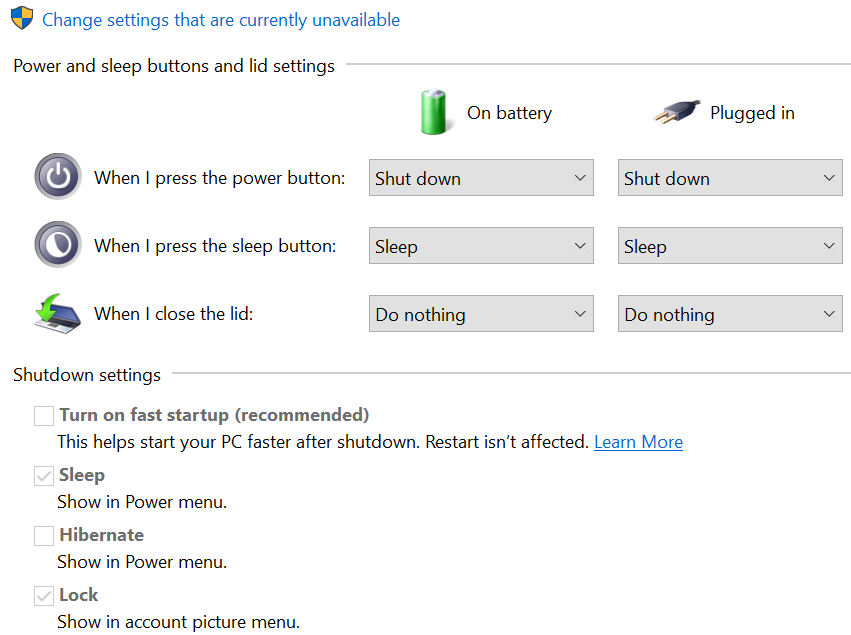
Some power settings should be turned off while within windows.
Open control panel and click through: All Control Panel Items > Power Options > System Settings
Turn off fast startup and hibernation.
If installing linux to the same drive as windows, it would be a good idea to turn off full disk encryption.
Go to bitdefender settings and disable encryption.
Return to bios menu, then select the usb you installed the linux iso to earlier.
If you want to create a ntfs partition, then you need to install the driver for it first:
Click the wifi icon in the toolbar to setup wifi.
Open the terminal and type: sudo apt install ntfs-3g
Run the install-ubuntu program on the desktop. Click through leaving all defaults selected and entering your computer infomation.
Once at the partition screen, select something else.
Identify which drive is not your main windows drive.
Then partition your drive, following the example partition layout:
500 mb (megabit), /efi, start of drive, type efi
>10000 mb, /, start of drive after efi, ext4 filesystem
---
leave some room (unallocated space)
---
<=8000 mb, /swap, end of drive, type swap
/storage, end of drive, type ext4 or ntfs filesystem
select partition to install bootloader: select your /efi partition
If windows has covered the entire disk you’ll need to shrink its partition.
Create / and /swap partitions same as above and optionally /storage.
When selecting partition to install bootloader, chose your windows efi partition.
If you get a black screen on your new installation, reboot to grub and press e on your ubuntu entry to edit its boot parameters,
add nomoset and then ubuntu should boot into a GUI.
Example parameter:
linux /boot/vmlinuz-5.3.0-26-generic root=UUID=a39c6c74-eb7e-4e17-b78a-d23c952061cd ro quiet splash nomoset
If the iso is obtained from an external mirror (not directly in the distributions site), make sure the hash doesnt come from the same mirror. Since if the iso was replaced its hash would be too. Though if you have no choice you can check the hashes authenticy with gpg.
Some websites will offer a torrent download, depending on the circumstances this could be faster than using direct http.
]]>